Showing posts with label Decorating. Show all posts

Monday, 24 January 2022

Starting the second room ~ The Flower shop

It has been a while! I hope you have all arrived safe and well in 2022.

I had to put my minis aside for a while because of some family stuff going on. I am finding it a little difficult to pick up where I left off. Almost forgotten where I was up to so I thought writing down what I did before it all came to a grinding halt would be a start...


I had build the carcasses for the two ground floor rooms of this house HERE back in October so after finishing the smaller of the two for 'Kaj Larsen's Furniture' as much as I could HERE , I started turning the other into a florist shop.

~ ~ ~ Ea's Blomster ~ ~ ~ 

[Ea's Flowers]

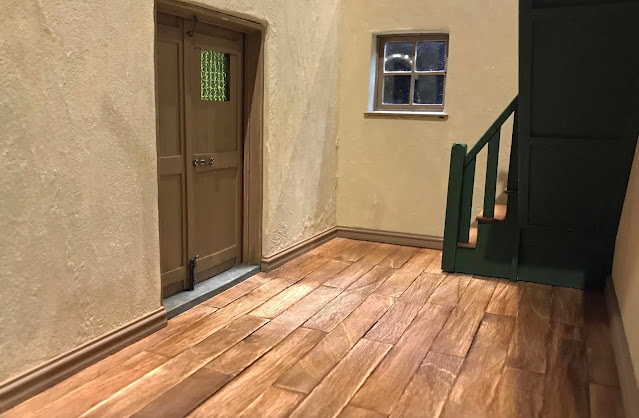
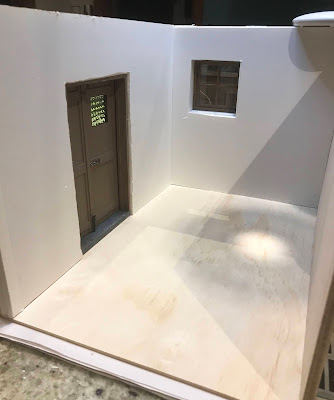
The box needed a rear door and stairs in the left hand back corner, so I decided to get those ready before finishing the walls and floor. 

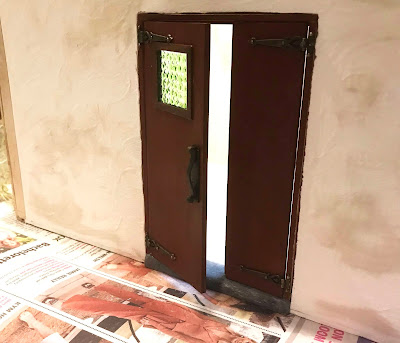
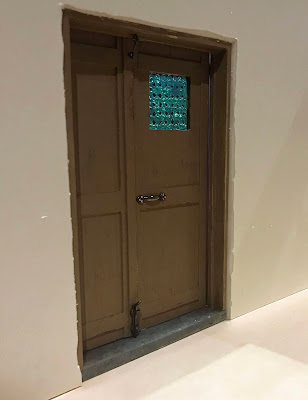
I had bought a door, I wanted to use but when I took it out of the packaging, I was disappointed to realize that there was no 'glass' in the transom windows above the door. I knew I needed to adapt the door a bit to fit but these things are still irritating, don't you think?

The door needed to swing the other way, the frame was not deep enough for the build-up wall and anything with glass is so much easier to paint without the glass in place -So I started by pretty much pulling the door and door frame apart. 30sec in microwave on high to soften glue - Thanks for that handy tip Brea (Otterine's Miniatures).

The door will sit flush with the external wall, so to allow for the extra thickness in the wall, I had to cut away the architrave that was glued to one side of the frame.


I added perspex to the transom and cut tiny pieces of wood to match those already in the window frame to hold it in place. I also cut strips for wood to add a door stop all the way around the inside of the frame - to stop the draft!


While it was all in pieces, I sanded and stained the threshold with oak stain. The door and frame was painted first with an 'undercoat' of dark brown the two coats of a fawn before being sanded and 'dirtied' in strategic places.


The finished door seemed a little bare, so I decided it needed a simple curtain. Lace was too fancy since this a back door allowing the florist to get to the rear yard behind the shop, so I made this simper curtain from a scrap of very fine cotton with lines of drawn threads.


I am forever surprised how much time you can spend adapting bought pieces - but equally satisfied that the playing around can transform a plain pine door into something that looks kind of real.

Next up, the stairs...
I will put that in the next post so this one won't go on forever LOL.

Have a lovely Monday.
Anna X


Thursday, 4 November 2021

Furniture Store ~ From box to room


Welcome to Kaj Larsen Furniture store.
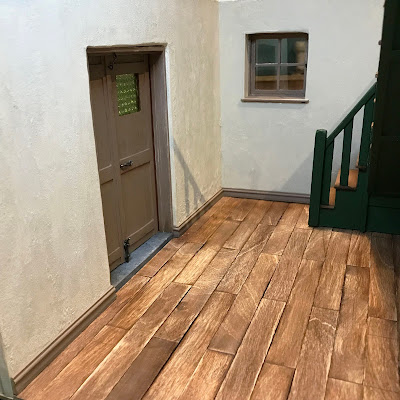
The first floor of Kaj Larsen Furniture now looks more like a room than a little wooden box.


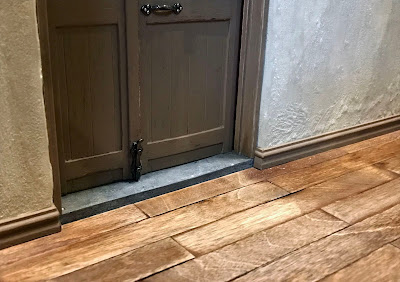
Once the floor was glued in place it looked a little too shabby. Even though this space is a workroom (Once upon a time the saddler worked here) converted into a shop space, the current owner Kaj Larsen is a man who takes pride in good presentation. I didn't have any furniture wax, but a friend had given me a massive chunk of bees wax. I rubbed that onto the floor and gave it a good rub after warming it up with a hair drier... It did the trick, I think. The worn oak floor now has a rich depth and slight shine to it. 


The skirting boards went on easily, although the tiny pieces into the front door step were incredibly fiddly. 


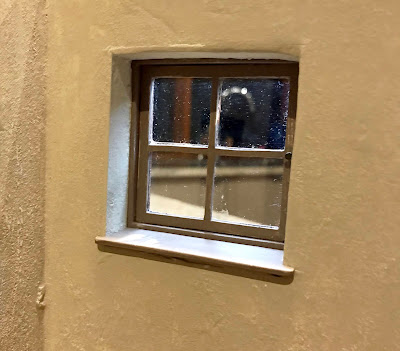
The window sill is in. Although the thick walls do compromise the already tiny room, I am so glad I made the decision to make them as thick as I did. I can't wait to decorate this little sill - kind of wish I had run a wire for a candle there - Wouldn't that just look super cute?
Never mind... there will be more thick walls and deep sills in this house, so plenty of time for that. 


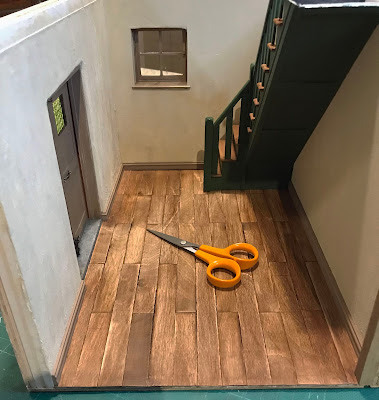
I popped my small scissors on the floor, so you can better get an idea of just how (deliberately) small this room is. Only 20cm (8") wide and 33cm (13") deep after the thickening of the back wall. So with one corner taken up by the stairs, it is not going to take much Furniture & Curiosities to fill it to the brim.

Stairs
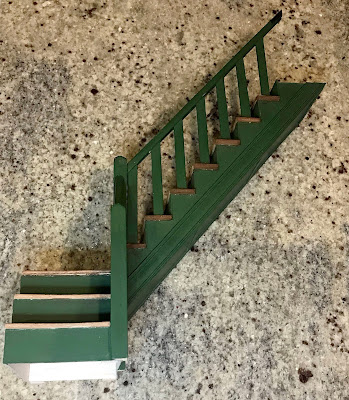
I built the stairs based on the instructions in Lea Frisoni's 'Big Book of a Miniature House' and (almost) completely forgot to take photos while making them. The stairs are mostly made from card stock, with balsa steps. I had to adjust Lea's measurements to fit the space. Since I am hopeless at measuring and ruling straight lines, I drew the stringers (the side bits) to scale on the computer and printed them out. Then I could glue those to the card and simply cut along the printed lines. It worked really well and I will be doing it that way again. 


The side of the long stringer looked a little bare, so I glued a timber molding in place for a bit of subtle decoration. 
The banisters and handrail is all made of wood. I didn't have a handrail and was too impatient to order one and wait for it to arrive. So I decided to try and make one using 2mm thick strip wood

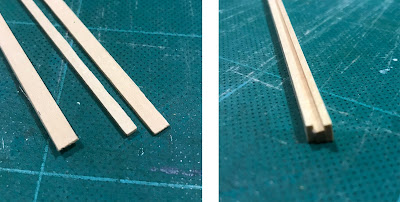
I cut 2 x 5mm wide strips and  1 x 3mm strip and glued them together with the narrow piece in the middle and all of them level on the top edge (apology for the blurry photo - it was the only one I took). The idea behind this was to create a 2mm wide groove to slot the uprights (spindles?) into so the whole structure would be more sturdy. I sanded the upper edge to a smooth round so the mini customers don't get splinters in their little hands. 


Getting the railing structure secured onto the steps proved rather more tricky. One thing was getting the angles right (I used my printed template again so I could glue it laying flat) but I hadn't thought of how I would secure it to the steps...
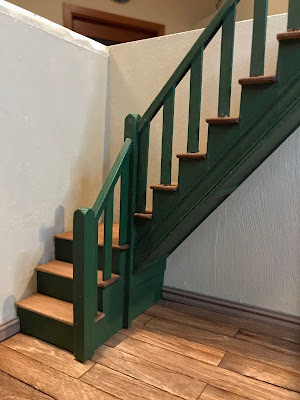
I ended up drilling tiny holes at the base of each upright and gluing a metal pin into each with super glue. I then super glued the railing in place, pressing the pins into the soft balsa steps. It is not perfect but kind of worked. The railing is securely in place but I am sure there must be a better way of doing it. No more railings in this house, so that discovery will have to wait. 


 I had build the stairs before I even built the room box, so it was a great relief when they actually fit. These are the first stairs I have ever built, so I have to confess to feeling rather pleased with the result.


So this is where it is at. Other than a bit of trimming (beams?) along the top of the walls and getting the ceiling ready, there is not much left for me to do on this box. I cannot wait to fill jam packed with Furniture & Curiosities.

Next up will be the box for the flower shop next door. 

Thank you everyone for stopping by. I cannot tell you how much your support, comments and suggestions means to me.
Have a great week(end)
Anna X


Monday, 11 October 2021

Furniture shop; Walls & Floor

 With the first two boxes build and the exterior 'rendered', I couldn't resist testing the door to the smaller shop. It fits perfectly and the light shining through the stained glass is just as I have hoped. 


I decided to start with the smaller box because I think it is the simpler of the two. I am going to be building up the thickness of some walls. I like deep-set windows and doors and want to try and create the illusion of lined stone walls. 


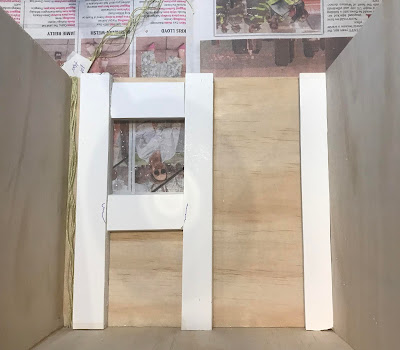
Starting with the back wall, I cut strips of foam core. I only have 6mm (1/4"), so I doubled these to get a 12mm (1/2") thickness. 
The strings running along the channel on the left will be used to guide wires through to the base of the house later. I am already worried that I might be creating headache for myself later on by having all the wiring complete concealed within the wall space...!? I might try and think up a solution for a couple of access points - we'll see.


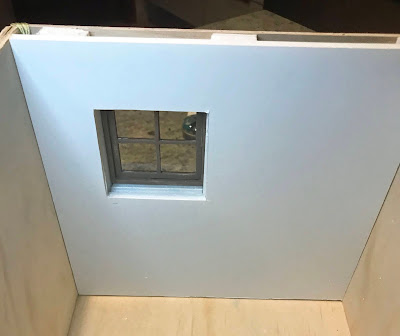
I added a full sheet of foam core on top and couldn't help myself to test how it will look once the window goes in. It is certainly getting the depth I was hoping for. 


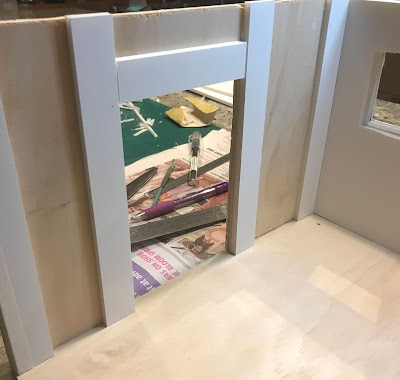
I repeated the process on the side wall that will house the door. This time though, only adding one layer of strips for the depth.


When I build the door, I had made the frame to fit two layers of foam core + the plywood shell - only I didn't measure my foam core because( I thought) I knew it was 5mm thick - Turns out is is 6mm so the door frame is too thin by 2mm (1/16")  (NOTE TO SELF: Always measure and double check!)


I am not planning on having an architrave around this door anyway so instead of building up the door frame, I cut the edge of the foam core to slightly round it off. 


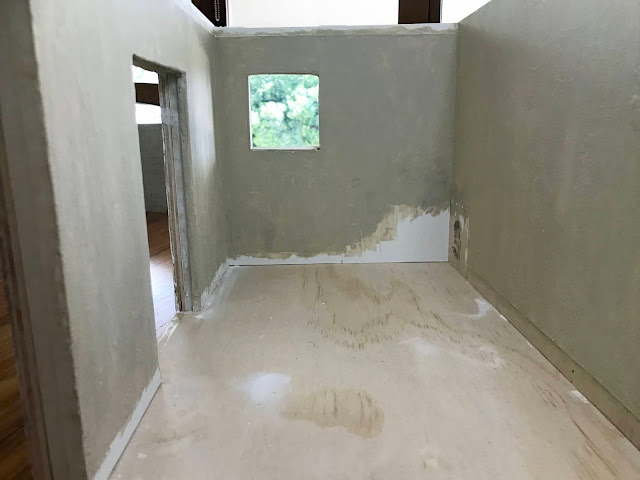
I have 'plastered' the walls with the same mix as on the outside and painted them in a sandy-beige colour. (Jo Sonia 'Smoked pearl'). I have only given them one coat and done a pretty patchy job. I am still pondering that I might give them a very light sand to smooth them down just a bit and wear down the paintwork even more.
Between the walls drying, I made a start om the floor. 

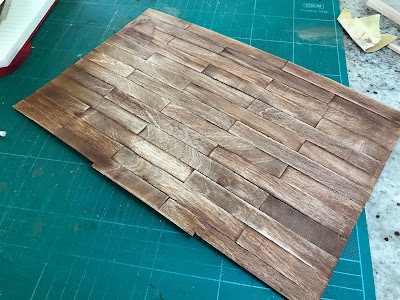
I used craft sticks glued onto a card template of the floor. Last time I did this, I had terrible trouble with them warping. This time I was extra careful when gluing them down and sure each had an even smear of glue to the very edges and put heavy weights onto everything right away. They dried nicely overnight. 


Then multiple thin layers of stain (watered down acrylic paint) to build up colour with sanding between. For the first two layers of stain, I dried the floor straight away with my hairdryer. It all worked and there is no warping this time. This is a good old worn floor so craft sticks are perfect for the look. They are not always completely straight, but for this old floor I have deliberately not filled it in the gaps but instead pushed a bit of very brown paint into them; just think in years to come, when someone decides to renovate this old house and put in a new floor, they might find old coins, bits of paper, buttons and other tiny treasures that has fallen down into those crack.

I have glued the floor in place in the box - as I write it is drying weighted down by a heavy library of books. Fingers crossed it sticks down nicely. 

Keep well everyone.
Anna X


Tuesday, 25 May 2021

Hanging curtains

 This weekend, I finished installing the curtains in the apartment.

Unlike all the dollhouse kits I have seen, the spacing between windows in old Danish houses is really narrow. At times no more than 50cm (20"), which translates to just 2mm (3/4"), which is the spacing I had made for The Toy House apartment. 

With such a narrow space between the windows, I had to be quite selective when it came to curtains, so that they wouldn't look too bulky. I have known all along that I was going (somehow) have semi-shear white lace curtains over roller blinds, which was really common for window treatment.


To make the curtains, I bought 10cm (4") wide Swiss embroidered edging lace. It is basically a Swiss voile with a machine embroidered edge. The beauty of it for this project is the fine, lightweight cotton, which draws up to fine, soft gathers beautifully. 

I cut the piece into the six lengths, pressed and handstitched the seams. Yes, you read correctly - handstitched! I know, slightly nuts, but I really don't like the stiffness of glued hems.
I then gathered up the top of each curtain before pinning the drapes into place and giving them a good dose of spray starch and leaving them to dry. 


While the curtains were drying, I made the blinds to go behind them (and of course forgot to take photos). They are basically a bit of fabric, rolled up around a toothpick, cut to length and a wee bit of string attached to the lower edge. You can just see a glimpse of them in the picture.

To assemble the whole thing, I cut three pieces of foamcore the same width as the windows. I glued a blind onto each piece. Once that and the curtains were dry, I glued a pair of curtains onto the front of each piece.
Then I cut a strip of balsa wood, slightly wider than the card pieces and about 1.5cm (5/8") longer than the trio of windows. This piece would both enable me to install the three sets of curtains nice and level, but also provide support for a pelmet.

I hope that all makes sense. You can kind of see how all the layers work in the picture above.

After debating about what to do for the pelmet for a bit, I decided to embroider one. I had (very brief) look around for a suitable ribbon, but an embroidered one would be nicely in line with the 'hand craft' movement of the time. 


I embroidered a strip of simple daisies. These are simple stitches (chain stitch, stem stitch and French knots), but I admit the size makes it a little bit fiddly. 
Once done, I cut it out and glued it over a piece of firm card. Before I glued the covered card onto the balsa strip, I stained the top of the wood to look like untreated, aged oak - now it just needs the dust to settle and it will look rather authentic LOL.


I am still undecided about curtain tiebacks. In some ways, it would make sense, but I don't want these windows to look too formal, and looking at photos it was rather common to have the curtains loose and just draw them back around the edge of the window sill... not sure yet. 

I hope you are having a lovely week everyone and hopefully find some time to mini.

Anna X


Monday, 9 March 2020

Stacking boxes & Bashing a stove

It finally happened last weekend... 


I stacked my three boxes and had a house. 

There is still a bit of construction to do, before I can attach the front, but at least it is now all stuck together and is looking more like a house.

The apartment on the first floor has been almost like this for quite some time, but I wasn't able to attach the ceiling light until now, which is why I didn't share it earlier. 
The other reason was that I was really unhappy with the stove I had. 


The resin stove was one of my early purchases and it was just too shiny and 'resin' looking. Besides, most Danish stoves were round (as I found out later). For my mini budget, this was not a cheap purchase, but he more I looked at it, the more wrong it looked and it was putting me completely off finishing it room. Until...


... I came across this picture from Fjellerup Østergaard (I of course forgot to save the link to the page where I found it) and it made me think that I might be able to 'up-cycle' my little stove to something I felt more happy with.


I liked the idea of a some kind of urn-looking decoration on top of the stove (a pot belly just didn't quite cut it). Without any exact plan for how I was going to make a 'cast-iron-urn' I pulled out a few different timber turnings and cut a few bits and pieces.


It was very much trail and error, stacking bits and pieces in different order, sanding, fitting, adding and taking away. It slowly started to take shape and once I added a couple of jewelry findings, I had something that with a bit of imagination could look like an urn.


Testing it on top of the stove, I begun to think that perhaps this could work after all.


After a bit more sanding, to straighten it up, I have it a coat of gesso and then more sanding.
I then painted it with acrylic paint stippled on to avoid streaks but mostly to get that cast-iron look. I glued it on top of the stove and then gave the whole thing two coats of mat black mixed with a wee bit of white and a blob of silver.


Once it was dry, I rubbed it down with very fine grain steel wool and felt so much happier with the look of my little square stove. 


Seeing it in the room, it might be a little elaborate for such a little apartment room, but I still think the overall look is so much better. 


Truffle the dachshund is curious as to when he can move in...


Enjoy our week.
Anna X