Showing posts with label Homemade hardware. Show all posts

Thursday, 30 September 2021

Welcome to my New Project...

Where do you start a new project? I started with a door.

I am not sure if starting with a door is odd, but that is what I have done. I do have a plan for this next house, but I had such a clear picture in my head of one of the doors, I just built it.

Unfortunately I didn't take any photos. The door, or doors are made from card stock that I scored to look like planks. I cut the hole for the window slightly larger smaller on the back and then made the frame on the front separate which allowed me to paint the door before putting the 'glass' in. 

I couldn't find a handle that I liked, so made this handle using a small curved section of a fancy cut mdf piece meant for balustrades. I glued it onto a piece of card and painting the whole thing black and then rubbed a bit of copper ink over it. It is much less shiny than in this photo and will pass for a cast iron handle, I think.

You may notice the 'glass' in the photo above is clear. That was my first attempt but I wasn't completely happy with it. The cathedral style of glass is made by smearing glue over the plexiglass - the method works fine, but it wasn't the look I was after. 

I really wanted coloured glass and after a bit of pondering, I decided to try mixing in some coloured ink. I also decided to use gloss modge podge instead of the glue. The tacky glue had dried beautifully clear but stayed slightly rubbery so I was thinking dust would stick to it over time and be difficult to clean off. 

This time, instead of smearing the glue on in a scrolling pattern, I put on rows of dots. I remember seeing glass panes that looked like rows of bottle bases once and thought it would look interesting. 

I managed to carefully pry the frame away and replace the cathedral glass with my coloured glass and am so happy with the result. 

(By the way: The glass is an afterthought by the current owner, set into an original door to 'fancy it up' and add a bit of interest - but more about that later).

and the inside. The doorframe is basswood and the stone step is made from balsa wood. The little latch that keeps the half-door in place works and to hold the top of the door, I made a tiny little working wire hook and eye. Looking at it now, I realize I will need to add some kind of locking mechanism so the shop owner can lock-up shop at night. 

It all went so well until the hinges. I got them all on, all glued, all the tiny nails in and then.. one of turning parts snapped on the half-door. Of course it happened after the glue had set. Short of pulling it all apart, I have decided to live with it and glued the broken part in place. 


It is disappointing but reality is that it will never be opened and closed I (and you) am the only one who knows it is stuck. 

So what is this new house? As you can see I have started to build something, but I will wait and show you more soon, when it actually will look like something other than a wooden box. I do hope to get to work on it some more this coming weekend. 

Thank you all for stopping by.
Anna 

Saturday, 6 March 2021

Corner cupboard

The cupboard doors are on and I could not be happier with how it turned out.


It was not as straight forward as I had wished for. At one point, I almost thought, I had ruined it all together.
This is how it went:
After painting the outside of the cupboard with several coats and lots of sanding, I carefully measured and cut out little notches for the hinges to rest in. 


Then I glued the hinges in place on the doors. It seemed to be going ok. I decided to leave the excess of the hinges overhanging the edges, thinking it would be better to trim them after I had glued the pins into the holes and the hinges were properly secured. 


Sorry, I forgot to take photos of the next bit - This is where I started to panic, thinking I had ruined it all.

I added the pins and then repeated the processes to attach the doors to the cupboard carcasses. Even though I had recessed the hinges and pushed the pins in as far as I possibly could, the extra bulk of the pin heads, meant the doors wouldn't close. The glue had not set hard yet, so I carefully pried the hinges off, cut the recesses deeper and tried again. Still didn't work, still wouldn't close nicely. The deeper recess meant there was too much strain on the thin hinges and they broke!

Deep breath!

I cut and made new hinges, this time without holes. I decided the cupboard won't be opened and closed so glue alone would have to do. 

I glued the hinges into the recess and once that glue had dried, instead of cutting the excess off, I bent and glued it around the edge of the door and to the back of the cupboard like at tine cranked hinge. 

I know this it not very authentic for a cupboard door, but I figure this is my small world, so I can bend the rules and I don't think it looks too bad.

The doors now open and close nicely, What a relief. 


I must confess I was rather excited, so I couldn't help but pull out some of the minis that will be going into the cupboard and pile them in to get an idea of how it will look...


... and then, I piled it all out again (you should have seen my work table that night!) and popped it into the apartment, keeping my fingers crossed that it wouldn't look too big and bulky in the little room.


It is snug, but it is how I had imagined it would be. Truffle the dog could not care less of course. He is simply put out, because I still have not made him a bed to go in front of the stove. Before I do that, I have a couple of little finishing touches to do on the cupboard.

Have a lovely weekend everyone and thank you so much for all the kind and encouraging comments. 
Anna X


Tuesday, 23 February 2021

Coming un-hinged

The corner cupboard for T. Tjørngren's apartment was coming along just fine.

Of course, I the glasses didn't quite fit into the top shelf (I knew, I should have tested them before gluing the shelf in place) but I was able to carefully sand the slots until they were wide enough for the glasses I have. 


Next, I built the doors. To get the rebated panels I sandwiched 3 layers of thin bass wood, even managing to to cut the curved upper edges to the front panels. 

Before gluing the panels on the front of the doors in place, I had 'undercoated' and sanded the front, thinking it would be much easier to get the nice and smooth that way. I also painted the inside of the doors the same pale yellow as the inside of the cupboards. Dry Australian summers are not kind to paint and I since I had mixed the colour a bit randomly, so was worried that if I left it too long, it would dry out and I wouldn't be able to match it later.

So far, so good. I was really pleased with how it was coming along. The plan was to to next pin-hinge the cupboard doors to the top, middle and bottom sections when I stacked the modules...

That's when I came unstuck!! 

Because I had built the drawer so it sits directly below and flush with the upper cupboard door there is nowhere for me to drill a hole to take a pin for the bottom of the door.

Ups! Now what?

Option one: redo the top cupboard with the drawer in a separate housing to take the pin for the cupboard door, or...

Option two: attach the doors with proper hinges (scary).

I really like the look of the drawer directly below the cupboard door and didn't really fancy rebuilding the whole top section. The problem with hinges are 1) The thickness of the door and frame is only 3mm, 1/8" or less. I don't have any hinges that tiny in my stash, and don't even know if they are available. 2) I am petrified that I will mess it up, trying to attach tiny hinges.

In the end, I decided to go with the hinges after all. I figure, if I do mess it up, I can always revert to option one and rebuild the top but it is worth a try. Now what to do about hinges??

I have had a go at making little hinges some time ago, so figured that by making them myself, I can get them the exact size I need them.


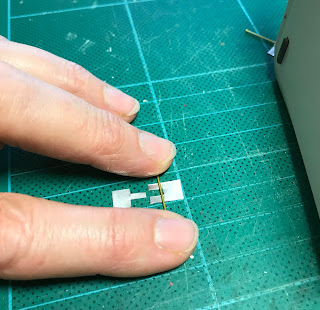
I cut the parts (6mm x 10mm wide) from tealight casing. This metal is so soft and pliable, that I could cut it with a craft knife which resulted in better, cleaner cuts than my scissors.


I knew from last time I made hinges, that my needle-nose pliers are not thin enough to roll the barrel to take the pin (sewing pin cut down) snugly. So instead, I simply folded the metal back over the wrong side of the hinge place. This metal is so thin and folded bit will be under the hinge once it is attached so I figure, once the rebates are cut in the wood, the extra tiny bit of thickness won't matter.


I then punched holes in the hinge plates to nails later just using an awl unto my cutting mat. To prevent the pin from falling out, I added a small dollop of glue to each end of the barrel as I cut the pin down to fit. 
And there four hinges ready to go. They are not perfect, but I am hoping they will do the job.

For now, I need to build and attach a pelmet at the top and some kind for feet to the bottom. Paint the cupboard and then hope and pray my little hinges work.

Wish me luck.

Anna 

Tuesday, 28 January 2020

Final details & Homemade Hardware


I sometimes find it hard to know when something is finished.. really finished. 
But I do think that now that the the brackets I made to hide the spotlight and frame the front and the little light switch are in place....
The shop in The Toyhouse is finished...


I am really quite happy with how the little switch looks on the wall, and the brackets too - although a bit of an afterthought worked out as I had hoped.
I still need to take a photo with the lights on - the spotlight makes such a difference.


****************************

The apartment above the shop is also very close to finished... I think. 
I, can't really show it yet, because I am building this house as three boxed stacked on top of one another, so the ceiling of the apartment is also the floor of the attic room. 
I really, really, really want to finish the structure of this little house and I have done quite a bit of work on the attic room. 


I have taken photos as I went along, but this is where it is at.
It is a plywood structure. The floor is made from pop-sickle sticks glued to card stock. I have tinted and stained it with several layers of paint and home-made 'stain' made from steel wool, coffee and tea left to soak in vinegar for quite a few weeks. It gives a wonderful dirty, weathered wood look that I wanted to the attic.


The partition, leading to an imaginary landing is made from card framed with strips of balsa wood.
smaller.  They are tricky to see in the picture, but under the shelf in the storage nook are three little peg-hooks so the resident student has somewhere to hang his Sunday best.

The door too is made from card stock and mini timber moldings. It does open, but is one sided so I am going to be leaving it closed. In the picture below, I had not yet put the hinges on. They are made following this brilliantly simple Hinge Tutorial. They are made from paper, that is glued tightly around a bit of wire. I mixed paint into pva glue to paint them to give them a bit of extra strength.


The keyhole is commercial week thing, but I simply could not find a door handle that was simple enough. Besides, I do know that most handles in more modest houses in Denmark were turned timber so....


... I shopped the end of a turned timber bit and sanded and sanded and sanded some more, until I had the handle I wanted. Who knew, it was possible to spend a whole evening making one wee handle???

Until next time....
Anna x