Showing posts with label Furniture. Show all posts

Tuesday, 10 August 2021

Into the loft

I have been tinkering. 

In fact the loft room has been looking kind of finished for some time. As you would know, there are always little details that can be added, played with and changed, but overall it now looks and feels how I had imagined.

It is a basic room. Karl Johan who lives here is not home much. He is a bright lad and came to town to study, so is lodging in the attic room of T. Tjørngren - the thing is, Karl Johan would much rather be out bird watching than spend time studying and it looks like he was down in marsh again this morning before class because is old pants have been hung to dry in front of the stove.


At the back of room, under the rafters is the sleeping quarters. Karl Johan is quite untidy, and making the bed is not a priority, but I do wish he would stop just slinging his nightshirt onto the bed when getting dressed in the morning. 

Modeled on traditional Danish beds, the little bed is the first piece of furniture I made from scratch for this house. 


I didn't take any photos while making the bed or bedding. The bed itself is made mostly from card stocks, with bits of turned banister for the legs and a length of fine wooden molding for the trim one the side. 
the bedding is made from old hankies - the lightweigth, well-washed cotton lending itself perfectly to old linen. Not sure if I was slightly mad when  spending an evening stitching the pulled thread border on the quilt cover. 
To be able to shape the messy quilt, I knitted the inner in thick soft wool, mixed with a length of super fine beading wire. It seems to do the trick. 

The little chest at the end of the bed is a really special piece. It was made as a special gift for Karl Johan from his 'uncle' Sam (Samantha Burns of Blueprint Minis) to house his collection of eggs and feathers. 

At one side of the small room is the 'kitchen' quarters. The table is a super cheap from the dollar shop, aged and roughed up. The accessories still need a bit of work but amongst the stuff is a little golden cup and blue frying pan from my childhood.


The stove is a Chrysnbon kit that I had great fun aging and wiring up. It was my first attempt at this kind of work and I was so thankful to find Brea's great tutorials on Otterine


Anything electrical still scares me, so no need to tell you how excited I was when the flickering lights actually worked.


At the opposite side of the room, is a small chest of drawers. This side of the room still needs a bit of work; it needs a mirror, perhaps a small stool...  


The chest is built from scratch. I had another, really pretty chest that was the perfect size but fare to 'nice looking' for the loft and I soon realized that finding a smallish chest kit was not easy so I built this one based on the same measurements. I have plans for one of the small top drawers...

The latest and last addition to the loft room is outside the window.

As I mentioned, Karl Johan is an eager bird watcher so of course he will do anything to attract them to his humble abode. 

I have come the conclusion that as much as I love trying my hand at almost anything, I might leave any kind of food making to all of those amazingly talented miniature food artists out there. I felt terrible 'butchering' a beautiful apple made Maria of SolsCreationsAU and tasty looking slice of bread by Bella of belladOllas (both on Etsy) but I think it looks inviting enough so that, hopefully, a bird or two will find its way to the feeder.  


I hope you are all keeping well and safe, and thank you for stopping by. 

Anna X

Saturday, 6 March 2021

Corner cupboard

The cupboard doors are on and I could not be happier with how it turned out.


It was not as straight forward as I had wished for. At one point, I almost thought, I had ruined it all together.
This is how it went:
After painting the outside of the cupboard with several coats and lots of sanding, I carefully measured and cut out little notches for the hinges to rest in. 


Then I glued the hinges in place on the doors. It seemed to be going ok. I decided to leave the excess of the hinges overhanging the edges, thinking it would be better to trim them after I had glued the pins into the holes and the hinges were properly secured. 


Sorry, I forgot to take photos of the next bit - This is where I started to panic, thinking I had ruined it all.

I added the pins and then repeated the processes to attach the doors to the cupboard carcasses. Even though I had recessed the hinges and pushed the pins in as far as I possibly could, the extra bulk of the pin heads, meant the doors wouldn't close. The glue had not set hard yet, so I carefully pried the hinges off, cut the recesses deeper and tried again. Still didn't work, still wouldn't close nicely. The deeper recess meant there was too much strain on the thin hinges and they broke!

Deep breath!

I cut and made new hinges, this time without holes. I decided the cupboard won't be opened and closed so glue alone would have to do. 

I glued the hinges into the recess and once that glue had dried, instead of cutting the excess off, I bent and glued it around the edge of the door and to the back of the cupboard like at tine cranked hinge. 

I know this it not very authentic for a cupboard door, but I figure this is my small world, so I can bend the rules and I don't think it looks too bad.

The doors now open and close nicely, What a relief. 


I must confess I was rather excited, so I couldn't help but pull out some of the minis that will be going into the cupboard and pile them in to get an idea of how it will look...


... and then, I piled it all out again (you should have seen my work table that night!) and popped it into the apartment, keeping my fingers crossed that it wouldn't look too big and bulky in the little room.


It is snug, but it is how I had imagined it would be. Truffle the dog could not care less of course. He is simply put out, because I still have not made him a bed to go in front of the stove. Before I do that, I have a couple of little finishing touches to do on the cupboard.

Have a lovely weekend everyone and thank you so much for all the kind and encouraging comments. 
Anna X


Tuesday, 23 February 2021

Coming un-hinged

The corner cupboard for T. Tjørngren's apartment was coming along just fine.

Of course, I the glasses didn't quite fit into the top shelf (I knew, I should have tested them before gluing the shelf in place) but I was able to carefully sand the slots until they were wide enough for the glasses I have. 


Next, I built the doors. To get the rebated panels I sandwiched 3 layers of thin bass wood, even managing to to cut the curved upper edges to the front panels. 

Before gluing the panels on the front of the doors in place, I had 'undercoated' and sanded the front, thinking it would be much easier to get the nice and smooth that way. I also painted the inside of the doors the same pale yellow as the inside of the cupboards. Dry Australian summers are not kind to paint and I since I had mixed the colour a bit randomly, so was worried that if I left it too long, it would dry out and I wouldn't be able to match it later.

So far, so good. I was really pleased with how it was coming along. The plan was to to next pin-hinge the cupboard doors to the top, middle and bottom sections when I stacked the modules...

That's when I came unstuck!! 

Because I had built the drawer so it sits directly below and flush with the upper cupboard door there is nowhere for me to drill a hole to take a pin for the bottom of the door.

Ups! Now what?

Option one: redo the top cupboard with the drawer in a separate housing to take the pin for the cupboard door, or...

Option two: attach the doors with proper hinges (scary).

I really like the look of the drawer directly below the cupboard door and didn't really fancy rebuilding the whole top section. The problem with hinges are 1) The thickness of the door and frame is only 3mm, 1/8" or less. I don't have any hinges that tiny in my stash, and don't even know if they are available. 2) I am petrified that I will mess it up, trying to attach tiny hinges.

In the end, I decided to go with the hinges after all. I figure, if I do mess it up, I can always revert to option one and rebuild the top but it is worth a try. Now what to do about hinges??

I have had a go at making little hinges some time ago, so figured that by making them myself, I can get them the exact size I need them.


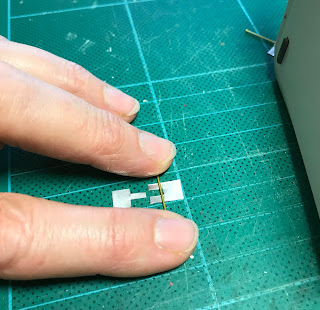
I cut the parts (6mm x 10mm wide) from tealight casing. This metal is so soft and pliable, that I could cut it with a craft knife which resulted in better, cleaner cuts than my scissors.


I knew from last time I made hinges, that my needle-nose pliers are not thin enough to roll the barrel to take the pin (sewing pin cut down) snugly. So instead, I simply folded the metal back over the wrong side of the hinge place. This metal is so thin and folded bit will be under the hinge once it is attached so I figure, once the rebates are cut in the wood, the extra tiny bit of thickness won't matter.


I then punched holes in the hinge plates to nails later just using an awl unto my cutting mat. To prevent the pin from falling out, I added a small dollop of glue to each end of the barrel as I cut the pin down to fit. 
And there four hinges ready to go. They are not perfect, but I am hoping they will do the job.

For now, I need to build and attach a pelmet at the top and some kind for feet to the bottom. Paint the cupboard and then hope and pray my little hinges work.

Wish me luck.

Anna 

Monday, 15 February 2021

Corner cupboard

There is still lots of little bits and pieces to finish on the upstairs apartment and I really haven't done anything on this room since.... way back when.


Half the pictures are still stacked against the walls and furniture; I still haven't hung the curtains; and I want to make a plant or two - especially for that gorgeous red and white pot by Lorie March that I was so lucky to win in a giveway a little way back. 

So this week, I finally set about building the last piece of furniture. I know the small room looks pretty packed already and I am hoping this last piece won't be too imposing. 
I am going to be  making a corner cupboard to go house the 'good' dinner set and other special bits and pieces. It is going to go in the right hand corner of the room. Once it is done, I am thinking the longcase clock (made from this Chrysnbon kit) may need to move over a bit and the small sidetable by the door will have to go. We'll see.


I did a bit of looking for corner cupboards online for ideas. These cupboards were quite common. My guess is, that in small rooms and apartments, being placed in the corner is rather space saving and still offers plenty of storage space. So searching in Danish brought up loads to images, many from antique store listings so they had the dimensions. A real bonus since that gave me something to work with. 
I didn't plan to try and copy one exactly, but I really like the one in the picture above - especially the way the drawer is set in - so away I went.


After drawing it up, I cut out paper templates just to test the size before I started building anything. I then decided to build it in modules, a top and a bottom. This allows me to have the top slightly smaller 
and will make it easier (I hope) to secure the doors (which I will pin - still to scared about hinges LOL).
I had really planned just for two shelves in the top section, but once I was at it I couldn't resist trying to cut a curved shelf with little slots for hanging fine glasses - I like how it looks, but I forgot to test if I have any glasses that will actually fit, so fingers crossed..


Building it this way also made it easier to work out how to make the drawer. I started by building the drawer itself, minus the front, and then put dividers under the bottom shelf for it to slide evenly. The front piece of the drawer will go across the full width of the cupboard front, so I won't cut that until I can measure exactly how wide I need it to be.


At this point, I realized it will be near impossible to paint the inside neatly, once the front panels are glued in place, so I have started painting it a pale cool yellow like the original in the picture. It still needs a couple of coats, but I am so glad I decided to this now and not having to get my brush inside it later on.

So far, so good. My next challenge is going to be cutting the 45 degree edges on the front panel pieces. I don't have any fancy tools for this, so it will be trail and error and a lot of sanding I guess.

Have a lovely week everyone and stay safe wherever you are.
Anna X


Monday, 30 November 2020

Making knick-knack

I had thought, I was going to log the building of the Toy House and its contents in some kind of order that made sense...


As much as that seems a logically and sensible way to go about things, that is never going to happen :-). I make things higgledy-piggledy, when I feel like it, when a great new idea comes into my head and when time allows. 

This week I made this 'thing'. Any guesses? 

It is tiny. Only 15mm (5/8") wide. There are three holes in the top piece and tree corresponding diverts in bottom piece. 

It is tiny. Only 15mm (5/8") wide. There are three holes in the top piece and tree corresponding diverts in bottom piece. 

Another clue...


I bought these Tiny Resin Pipes from Nalladris some time ago and painted them. (Obviously, Thomas Tjørngren would enjoy a pipe in the evening). They are minute and I needed to somehow keep them together and make sure they wouldn't get lost. I had thought perhaps a wall mounted shelf or rack of some kind, but then I found a few pictures of antique pipe racks and was surprised to see just how elaborate and clever some of them were with built-in tobacco drawers and detailed decorations. 

I settled for this more modest version as a model for my mini version. 


The little pipe stand fits beautifully on the shelf in front of the top row of books. The beautiful little vase is by the talented Lorie Marsh of Lorie Marsh Ceramics - I was so lucky to win this and a larger pot.

~ ~ ~ 

I built a small bookcase for the upstairs apartment from scratch a little while ago. I couldn't find one the size or height I wanted - sort of half way up the wall. Those I looked at were either way above my budget or clunky and 'ugly' looking so I figured... It's all just rectangles, how hard could it be?


The bookcase is made from basswood with timber mouldings for the trim at the top and front edges. 
I took the photo before it was varnished - or rather, I use layers of French polish. It takes time and layer upon layer but I find it easier to control the final look of the piece. 


The top moulding doubles up as the front of a shallow drawer. My grandmother had a cupboard with a very shallow drawer at the top like this. Just out reach of little people but not so high grown-ups couldn't reach it easily. I found it most intriguing as a child.
In it, she kept special things.. 


... like photo albums and medals. 


Like the pipes, the tiny medals are from Nalladris. I threaded the medals onto tiny pieces of silk ribbon before popping them into little boxes. The boxes from black card, with ribbon for hinges and silk ribbon for the little 'pillow'' inside.

 
To fill the shelves, I first made a pile of books. Books are fun and easy and filled the shelves quickly. A couple of them open, but most are made from covered balsa blocks. 


To make the wood look like pages, I scored the block multiple times with the tip of my craft knife before painting them cream/ivory and then rubbing a bit of chalk pencil onto them. I think it works.

There are way too many books and I need to find more knick-knacks, but this is a start. 

I hope you are all keeping well, staying safe and looking after yourself and those around you.
Anna X


Monday, 7 October 2019

Stepping up

I have still not started stocking the shelves in The Toy House. There are several reasons this has happened yet, mostly to do with real life taking up way too much time and that I know I need a lot, and I mean A Lot more toys to fill the floor to ceiling shelves!


The other small issue is that I realized H. R. Tjørngren, the shop owner, would never ever be able to reach the top shelf to get the toys down once I put them up there! He was going to need a step ladder.


I got a fabulous little library ladder kit (and a few others) from Jane Harrop which is just the perfect height. I have given it numerous layers of paint, sanded down between each coat - mostly because I could not decide on a colour. In the end, it is now looking suitably worn.


H. R. Tjørngren seemed pretty happy. Perhaps, he is just happy to be out of the box, he has been in for over 20 years. That is how long ago it is that I made him.


Testing the ladder...


.. yep, those top shelves are now within reach. It looks like I better get started making more toys.